{article.name}
Social Media Links
How to Tile a Shower

- Share this:
- Share on Facebook
- Pin on Pinterest
- Tweet on Twitter
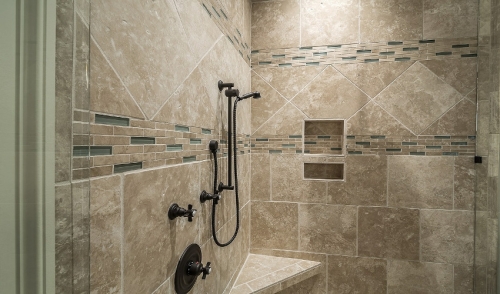
Tiling a shower is a great way to revamp your entire bathroom. The different options and styles available open up a ton of opportunity to create something that is truly unique and different. Long gone are the days of dingy white tiles or the classic vintage pink tiles that can be found in old homes. Tiles come in all shapes, sizes, and colors to help you style your bathroom so that it pops without breaking the bank. Keep reading this article to uncover step by step instructions on how to tile a shower.
Before any tile can be applied, you must prep the shower. If this is a brand-new bathroom, its means making sure your cement boards and shower pan are firmly in place. If this is a DIY project, it means stripping the old tile down until you get to the studs. Always mask the edges around the cement boards with fiberglass mesh tape to prevent moisture from getting behind the walls causing damage to the framework of your bathroom. For areas that may be more water-prone, apply a waterproofing membrane for further protection. Once the foundation of the shower is prepared, plan the layout of your tile. Layouts can be hard or easy depending on the size of the tile you are using and the design you are trying to implement. If you’re mixing and matching different shapes and colors, I recommend sketching it out with a pencil on paper and along the walls of the shower to fully understand what’s going to go where. Take measurements of your shower from the bottom-up and be prepared for the top row to not fully fit. Keep a wet tile saw handy to cut tiles as needed to fit your shower. Following the layout preparation, it’s time to mortar the tiles to the bottom row. Using quality thin-set mortar, apply a layer to the first row where you plan to apply the tile. When mixing your thin-set, try to achieve the consistency of peanut butter so that the mortar sets correctly along the wall. Feel free to also apply a thin layer to the back of larger tiles for increased effectiveness and adhesion. When installing your tiles, start from the middle and work your way out on each side to give off the visual effect that everything is centered. Regardless of the grouting and caulking that will come later, as you install the tile always wipe away any thin-set that’s oozing out the sides. Additionally, use small shims and other spacers along the bottom row and in between the tiles. The next step is to continue to repeat this procedure, setting each row of tile on top of the last until you reach the top of the shower stall. As you work to the top and towards the edges, use the tile saw to make necessary cuts to fit tiles as needed. Double-check your grout line every few rows to make sure everything is even and aligned in respect to your tile layout and design. After the mortar is set, you can remove the shims from the bottom and apply caulk between the bottom of the tile and the lip of the pan. Using a rubber float and a damp sponge, apply grout to the tile and smooth it into the joints between the tile until flush. After 30-40 minutes, wipe the excess grout with the damp sponge until the tile is clean. If the tiles still look a bit hazy after wiping, use a fresh sponge to buff it away. Allow three days for the grout to fully cure before applying sealer and caulking any needed areas.
Once everything has fully dried, wipe everything down one last time and hop in! Tiling a shower doesn’t have to be difficult or time consuming. Use the steps and tips in this article to revitalize your bathroom today. You’ll be so happy with your work, you just might use all the hot water.
Sign up for our Email List
Stay updated with all our latest posts, products and offers! Just enter your information below.


Comments